
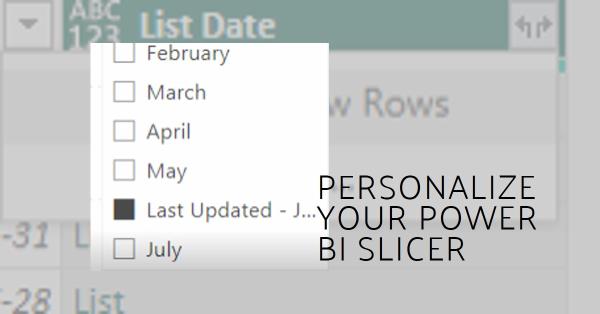
Why fix the Power BI slicer for the current month/last month?
Fix the slicer date in Power BI, in this post, we will explain tips to optimize the slicer date in Power BI within a specific month.
In certain cases, the teams need to fix the actual month to filter that continuously. Seen another way, you always filter the report teams with the last month, most commonly to KPI report that is fully update it the last day of the month.
To learn more about create Data Table see the article: How to create a calendar table in Power BI? – pwrinsight.com
Step 01 – Identifying the actual month
One of the useful functions available in Power BI is Date.Month(DateTime.LocalNow()), which can be used to create a column that identifies the current month is based on another column containing date values. In this article, we will explore how to use this function to create such a column and insert a “Current Month” text.
Understanding the Date.Month(DateTime.LocalNow()) function:
The Date.Month(DateTime.LocalNow()) function is a Power BI function that returns the current month number based on the local system date and time. This function is useful when performing calculations or comparisons based on months.
Step 02 – Identifying the actual month
Preparing the data: Before using the Date.Month(DateTime.LocalNow()) function, it is important to have the data properly structured and formatted in Power BI. Make sure that the column containing the dates is in the appropriate date/time format.
Explanation of the code: The above formula uses the MONTH function to extract the month number from the date column. Then it compares this value with the current month number returned by the Date.Month(DateTime.LocalNow()) function. If the values match, the new column will be filled with the “Actual month ” text; otherwise, the column field will be the month name [Month].
if [Month.1]=Date.Month(DateTime.LocalNow()) then "Actual Month" else [Month]- Select the table or visualization where you want to add the new column.
- Right-click on the table and select “Add Column.”
- copy and paste the function code explained above in the Custom column formula space.
- In this code, replace “Table” with the name of the table where the date column you want to analyze is located.

The above formula uses the MONTH function to extract the month number from the date column.
Customizing the new column: After creating the new column, you can customize it according to your preferences. For example, you can change the column name and formatting, or even create conditional rules to highlight values corresponding to the actual month and type text.
The next image gives us the result. Looking at the base column [month.1] the value 7 (7th month) and compare at the new column “Actual Month” we can see the result subscribed.

Step 03 – Identifying the last month
This step is necessary to include a new formula to wrap up the formula that returns the current month. The simple way to get the last month is to use the experience acquired till now and wrapped this a Date.AddMonths. Good, but the first question explodes in my mind: How i will get the last month with the formula to add months?
Therefore, to understand this new formula look at the complete formula below:
if [Month.1]=Date.Month(Date.AddMonths(DateTime.LocalNow(),-1)) then "Last Updated" else [Month]Let’s analyze this formula like an onion with many layers. Think that so far I know a formula that returns me the current month in numerical form. The next step would be to know how to seduce a month of the current month so that this information is dynamic, this means that in July the formula returns me to the month of June and in December the formula will return me to November.
In this case, the formula add month has two arguments: the current month and another numeric argument that makes it possible to add a value to the current month. Hum!!! So to get the next month I include 1 in that argument. Concluding if I put -1 I will have the previous month, we are dealing with a number field.
Step 04 – Optimizing the value returned
Rescuing the source. Remember when we wanted to add text to a value returned from an Excel formula? That’s right, let’s do the same thing. using the “&” character to concatenate the result of the formula with the corresponding record value of the [Month] column. Remembering that the [Month] column was extracted from the base date column returning the name of the month contained in this date.
Explanation of the code: The above formula uses the MONTH function to extract the month number from the date column. Then it compares this value with the current month’s number returned by the Date.Month(DateTime.LocalNow()) function. If the values match, the new column will be filled with the “Last update” concatenated by the name of the month, using “&[Month]”. Otherwise, the column field will be named [Month].
Therefore, from this step, we will compare this result with the month.1 column. If this statement is true, the field of the new column created will receive the value “Last Update – “&[Month]. Translating this to our example we will have the return:”Last Updated – Jun”
if [Month.1]=Date.Month(Date.AddMonths(DateTime.LocalNow(),-1)) then "Last Updated - "&[Month] else [Month]Step 05 – Beating the cake batter
Beating the cake dough to get the new column with every month of the column [Month] the exception of the month before the current month, no matter what this month is.
In this way, follow these steps:
Simply, we will repeat the same steps to create a current month
- Select the table or visualization where you want to add the new column.
- Right-click on the table and select “Add Column.”
- copy and paste the function code explained above in the Custom column formula space.
- In this code, replace “Table” with the name of the table where the date column you want to analyze is located.

The results can be seen in the next image. So, customizing the new column, after creating the new column, you can customize it according to your preferences. For example, you can change the column name and formatting, or even create conditional rules to highlight values corresponding to the Last Updated – June and type text.

Step 05 – Applying fix slicer within the Power Bi report
Applying the solution in the Power Bi report
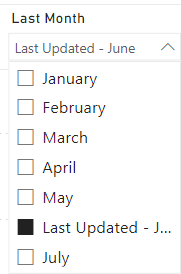
- Go to the report page and Insert a new slicer
- Select the created column, Last Month to fill the slicer
- Open the list on Dropbox and select the option “Last Updated – Jun”
- The last step is save the report.
Note: Once this property saves every time that you open the report this filter will apply to the selected item. The text name month will be updated automatically without losing the parameter. But, if you change the parameter filter and save the rule will change.
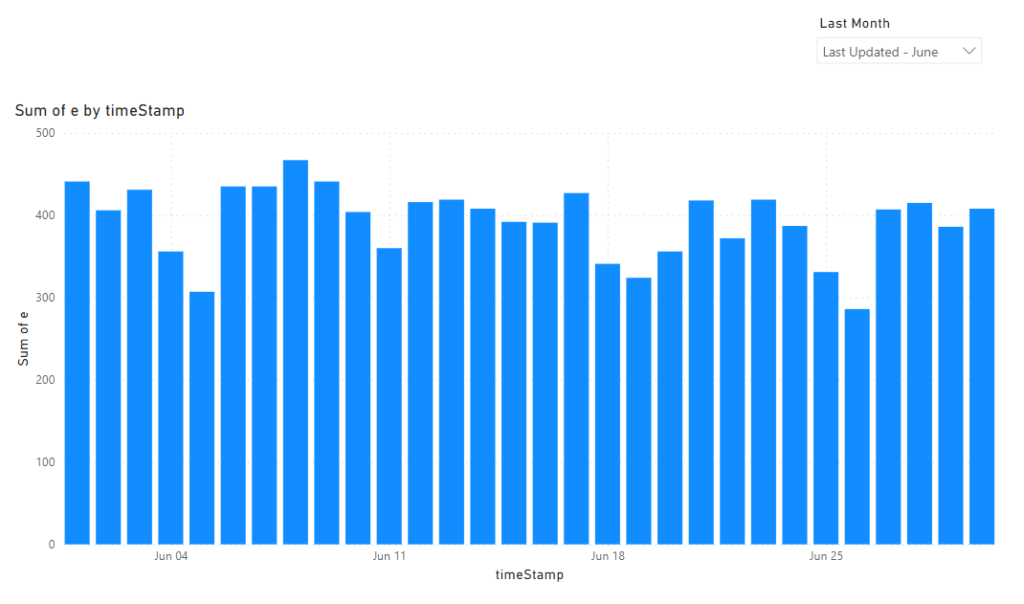
Looking at the result on the graphic report: Last month updated.
Looking at the result on the graphic report: Actual Month.

Conclusion by benefits to optimizing slicer in Power Bi report
The Date.Month(DateTime.LocalNow()) function is a valuable tool in Power BI for identifying the current month based on a column containing date values.
By using this function, you can create a column that inserts a “Current Month” or “Last updated month” text, making it easier to visually understand the data and highlight the relevant information.
Mastering this function will enable you to perform advanced analyses and make informed decisions based on the data of the current month.
Artifical inteligence Power Apps Power Automate Power BI Power Platform Connector UX design
