

Good question: Is possible save time with "do until" statement construct in power automation?
Lets go see how is possible gain productive job with power automate.
“I can ensure without fear that we can consider do until loop in power automate the most importte construction.”
This construct allows programmers to repeatedly execute a block of code until a certain condition is met. In this loop, the code block is executed first and then the condition is checked.
If the condition is true, the loop is executed again, and if the condition is false, the loop stops executing.
I consider the importance of the “do until” control in Power Automate can be explained by the following reasons:
It helps automate complex workflows: Power Automate is used for automating complex workflows that involve multiple steps and conditions.
It provides flexibility: The “do until” control provides flexibility by allowing you to specify the condition for loop termination at the end of the loop rather than at the beginning.
This can make it easier to write workflows that deal with complex conditions and situations.
It simplifies workflows: The “do until” will simplify workflows by reducing the amount of code that needs to be written.
When you automate repetitive tasks, the “do until” control allows you to focus on more important tasks.
It saves time: you can automate repetitive tasks and simplify workflows with “do until” control can save you time.
This can be particularly useful in situations where you need to process large amounts of data or perform complex calculations.
In my conclusion, the “do until” control is an important construct in Power Automate because it helps automate complex workflows, provides flexibility, simplifies workflows, and saves time.
Step 1
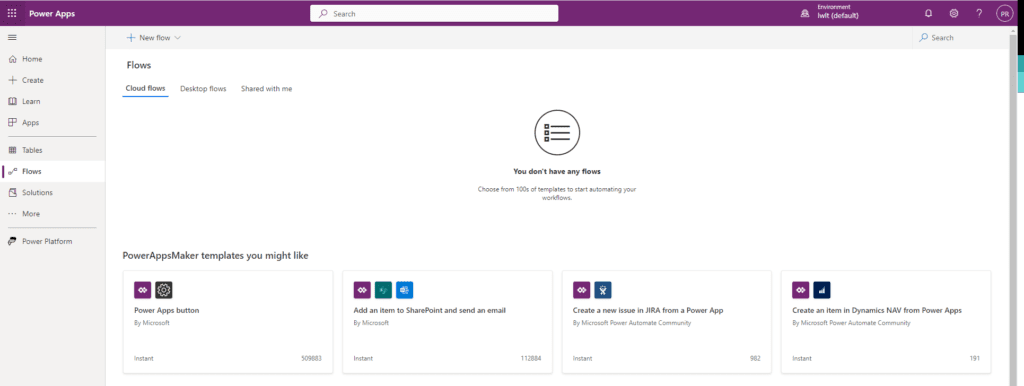
Login to the required Power Apps environment using URL make.powerapps.com by providing username and password and click on Flows on the left-hand side as shown in the below figure.
Step 2
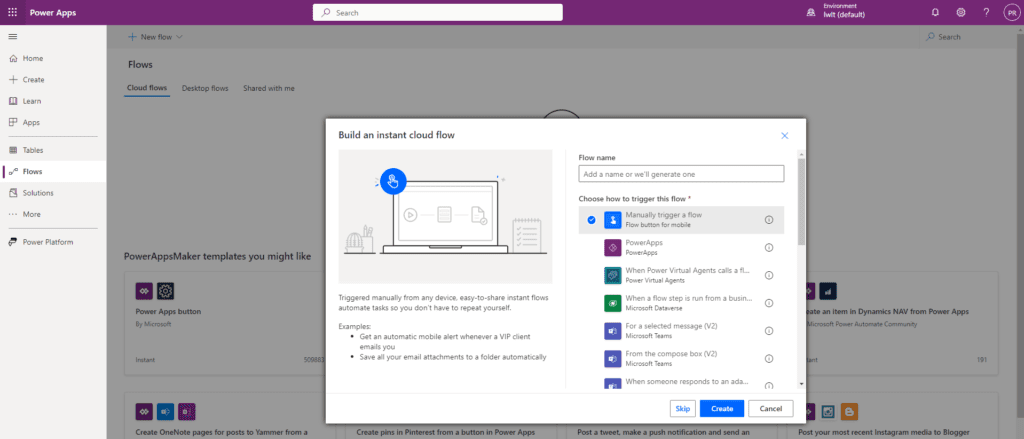
After Step 1, Click on New Flow and select instant cloud flow and provide the trigger as Manually trigger a flow and click on create as shown in the below figure.
Step 3
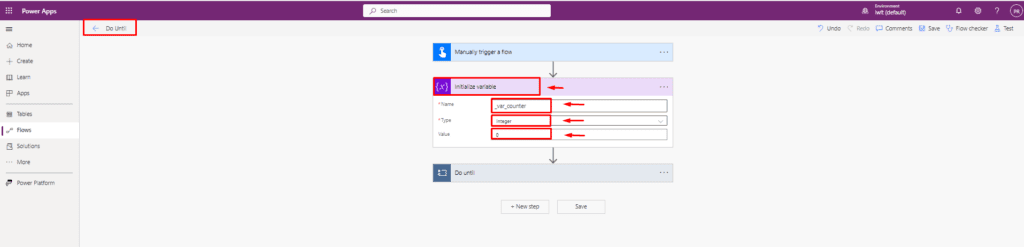
After Step 2, name flow as do until Function and take initialize variable as Set Variable Counter to 0 with the following fields : Name: Counter, Type: Integer and Value : 0
as shown in the below figure.
Step 4
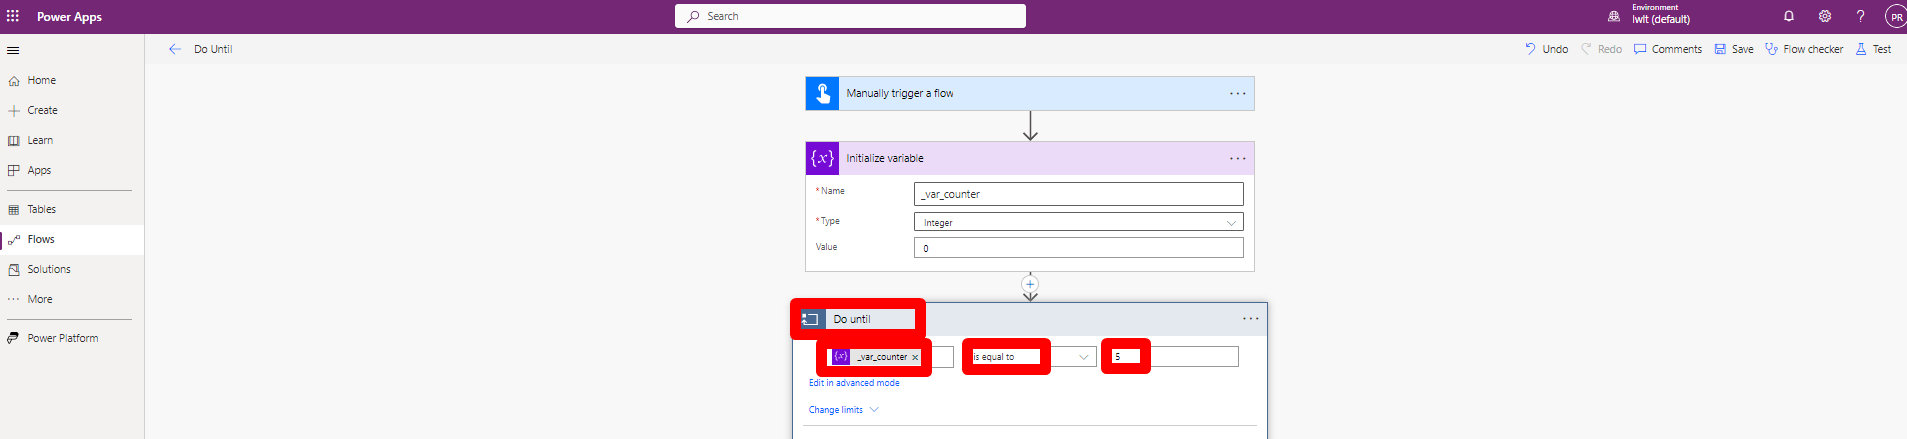
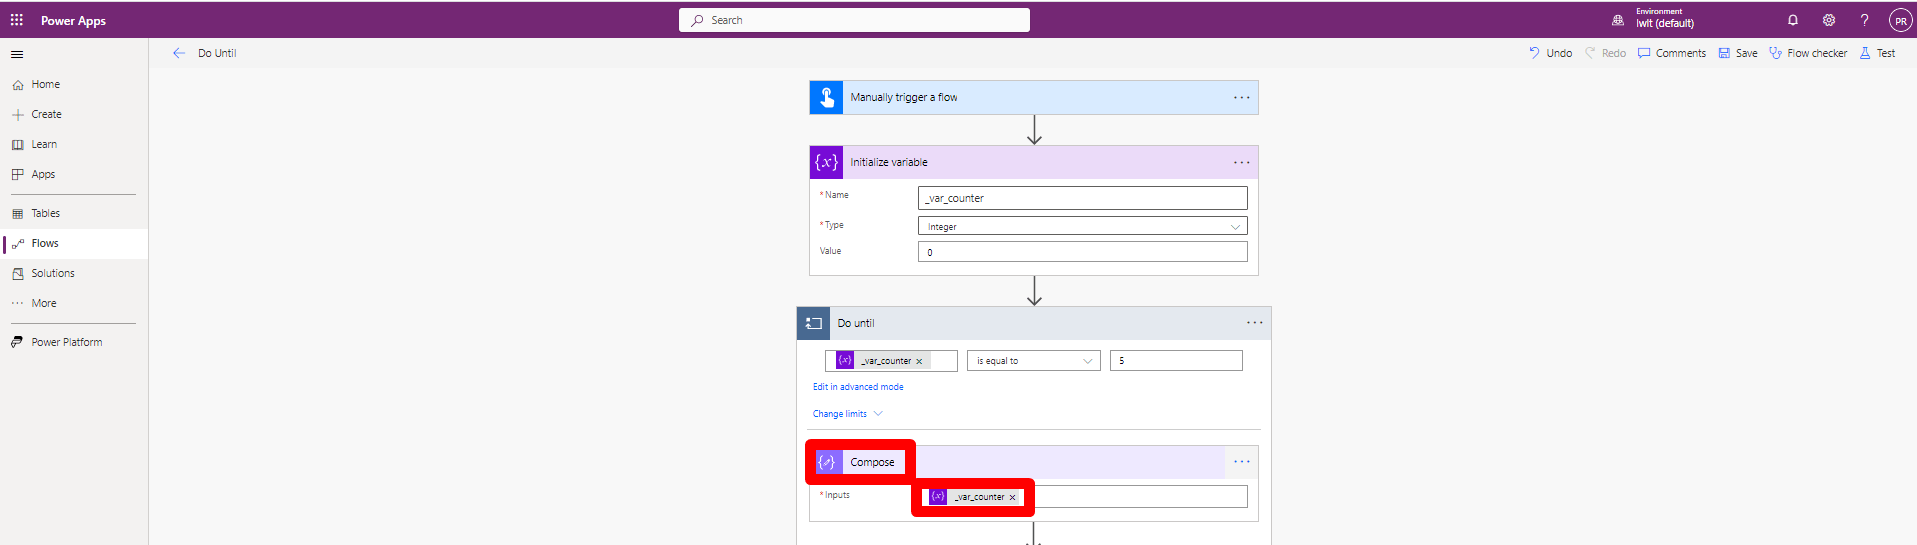
After Step 5, take do until Action and name it as do until counter value becomes 5 and provide the following condition: Variable: Counter, Condition : is equal to and Value : 5
as shown in the below figure.
Step 5
After Step 4, take compose action and name it as Show Counter Valueand provide the input as: Inputs : “Counter Value : ” {variables(‘Counter’)}
As shown in the below figure
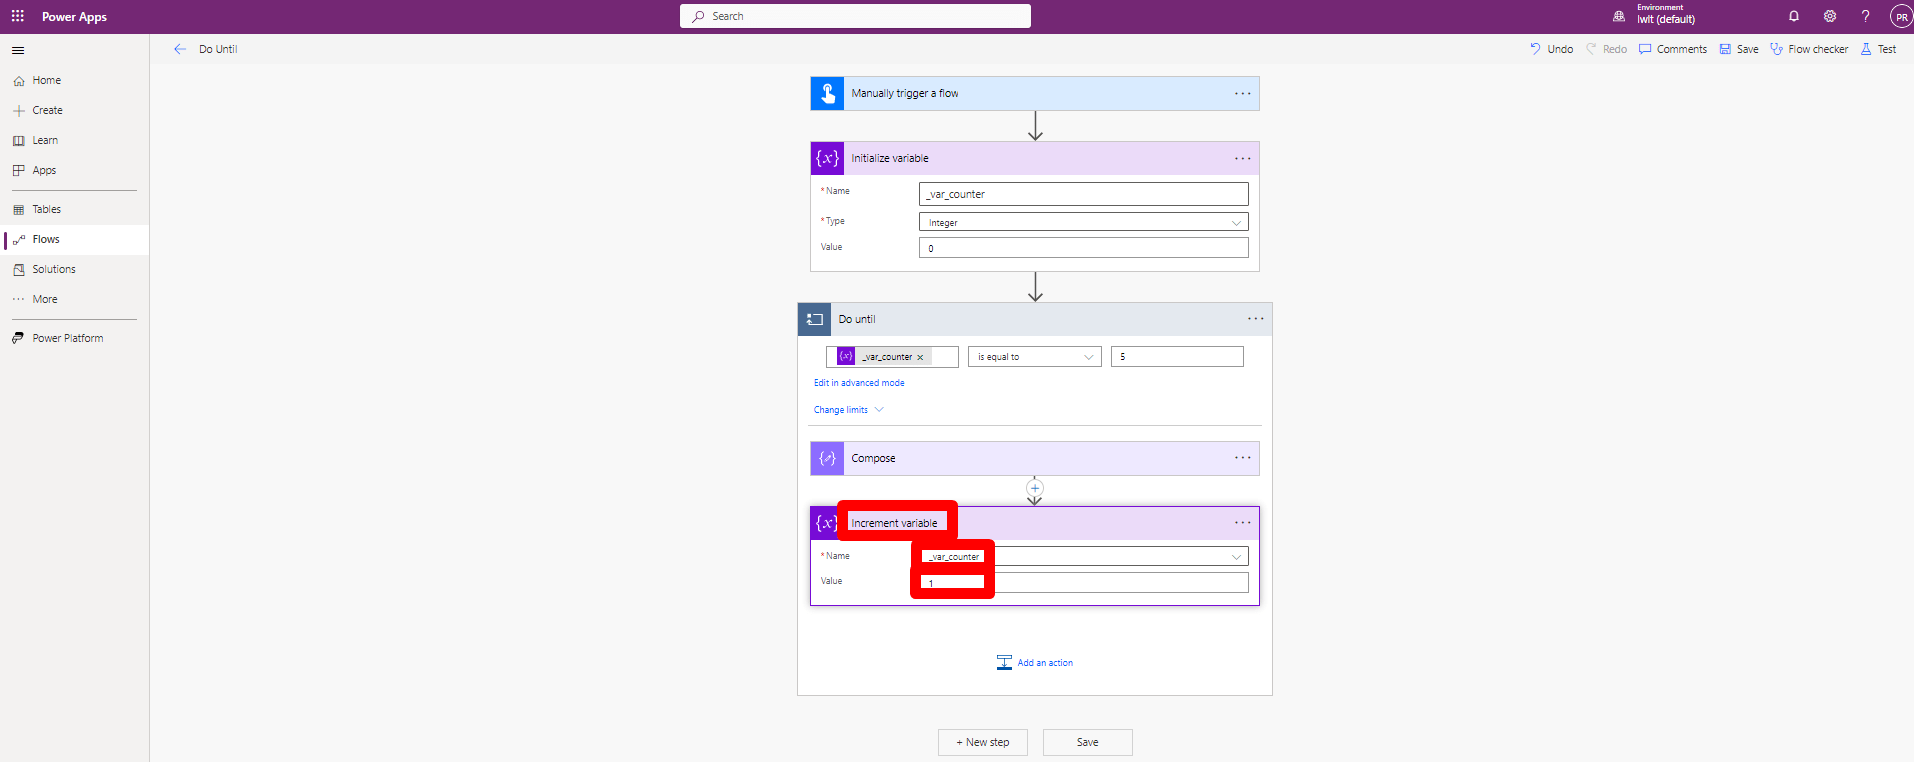
Step 6
After Step 5, take increment variable and name it as Increment Counter variable by 1 and provide the following details: Name : counter and value : 1
As shown in the below figure
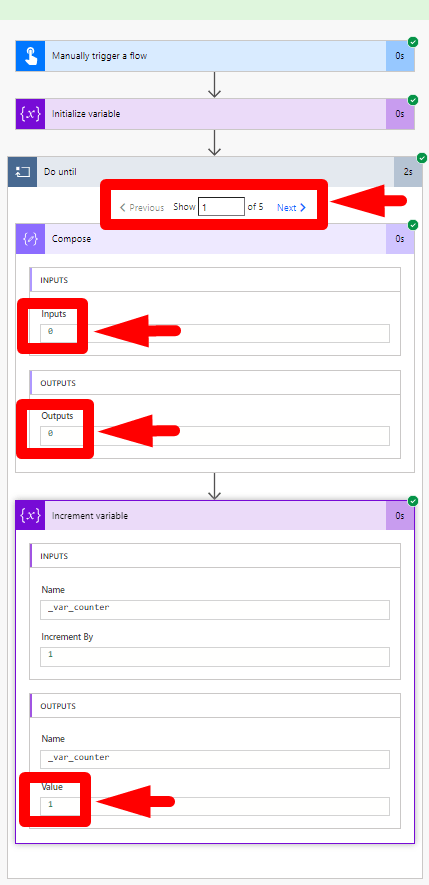
Step 7
After Step 6, save the flow and test and run the flow and observe the result such that Do until loop will execute till Counter value equal to5.
As shown in the below figure
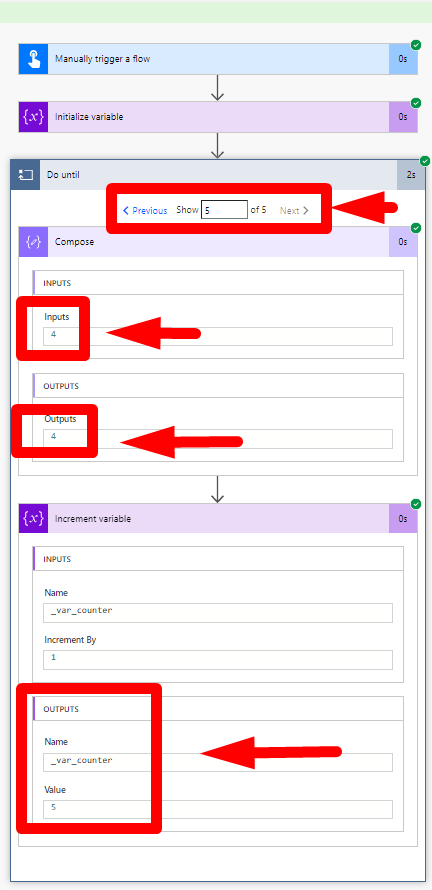
And the last step looks like this below
Note
- Make sure to save and run the flow whenever you try expressions.
See more in our article lists:
If you want to learn more about this topic click on this Microsoft link
