
The context: Power BI creates a list date range from two dates.
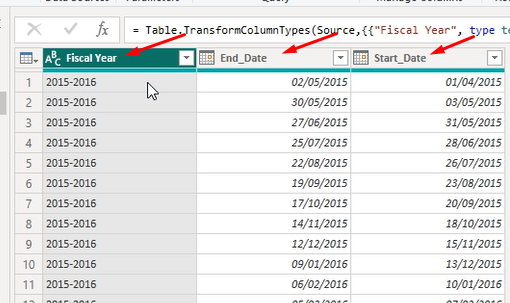
In this case, the table on the left represents different periods of analysis in yo company. The first column has the financial year. You already saw that this company doesn`t work with a traditional 12 months. You will note that the second column “End Date” corresponds to the final of each period and the third column has a start period.
Another observation, the first period starts on April 1 fo 2015 and Ends on 2 May. Look up the 5 lines – the 5 period starts on 26 July and ends on 22 August. We need to expand this table to create dates between these different ways. The target is to create a Power-BI list date range from two dates.
I. What is the Number.From function:
In Power Query, a powerful data transformation tool offered by Microsoft Excel and Power BI, there are various functions that allow efficient manipulation and transformation of information to obtain Power-BI list date range. One of these functions is Number.From, which plays a fundamental role in converting data into numbers. In this article, we will explore in detail how the Number.From function can be used to convert different types of data into numbers, providing greater flexibility and accuracy in your analyses.
The Number.From function is a native function in Power Query that aims to convert values into numbers. It is especially useful when dealing with data imported from external sources or in non-numeric formats, such as text, dates, or currencies.
II. Syntax of the Number.From function:
The basic syntax of the Number.From function is as follows:
– Function: Number.From(value)
In the event, that “value” parameter represents the data that you want to convert into a number. This value can be a column in a table, a specific cell, or even a constant.
III. Using the Number.From function:
The Number.From function is extremely versatile and can be applied in various situations. Let’s look at some practical examples of how to use it:
a. Converting text into numbers:
Suppose you have a column called “Value” in a table that contains numeric values stored as text. To convert these values into numbers, you can use the Number.From function as follows:
= Table.TransformColumnTypes(Table,{{"Value", Number.From}})Note: This expression will transform the “Value” column into numbers, allowing you to perform mathematical calculations and analyses more accurately.
b. Converting dates into numbers:
Converting dates into numbers:
In certain situations, it may be necessary to convert dates into numbers for comparisons or specific calculations. By using the Number.From function, you can easily make this conversion. For example:
= Table.AddColumn(Table, "NumericDate", each Number.From([Date]))Note: This formula will add a new column called “NumericDate” to the table, containing the numeric values corresponding to the dates in the “Date” column.
c. Calculating the difference liste date range between two dates:
Suppose you have a table with two columns, “StartDate” and “EndDate”, containing dates in text format. To calculate the difference in days between these two dates, you can use the Number.From function combined with other Power Query functions. Here’s an example:
= Table.AddColumn(Table, "DaysDifference", each Number.From([EndDate]) - Number.From([StartDate]))In this case, the Number.From function is used to convert the dates into numbers, allowing the subtraction operation to calculate the difference in days.
IV. The last tip is List.Distinct or {…} function:
a. Create a simple list range:
In Power Query, you can use the List.Distinct function to create a new list that contains only the unique values from an existing list. Here’s how you can use it with the list {1, 2, 3, 4, 5}:
- Open Power Query Editor by clicking on the “Edit Queries” button in the Power Query ribbon.
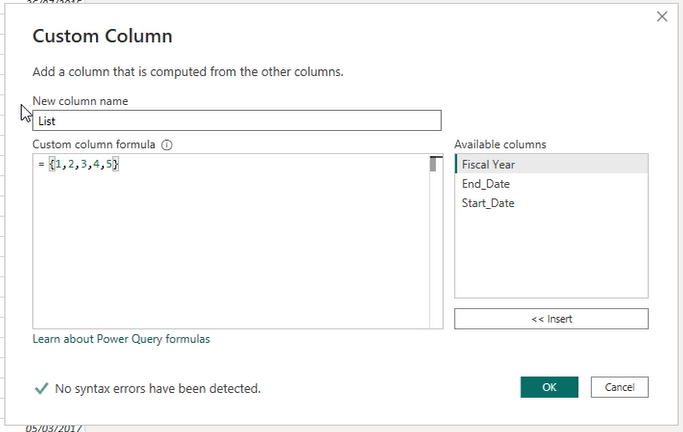
- Go to the “Add Column” tab in the Power Query Editor ribbon and click on the “Custom Column” button. This will open a dialogue box where you can enter a custom formula.
- In the “Custom Column” dialogue box, enter a name for the new column (e.g., “List”) in the “New column name” field.
- In the “Custom column formula” field, enter the following formula:
List.Distinct({1, 2, 3, 4, 5}). Replace{1, 2, 3, 4, 5}with the name of your actual list if it’s different. - Click the “OK” button to create the new column.
b. Expand the list date range:
Power Query will apply the formula and create a new column with the unique values from the original list. You can then further manipulate or use this new column in your data transformation process.
That’s how you can use the List.Distinct function in Power Query to create a new list with unique values.
IV. Finally, create a list date range from between dates :
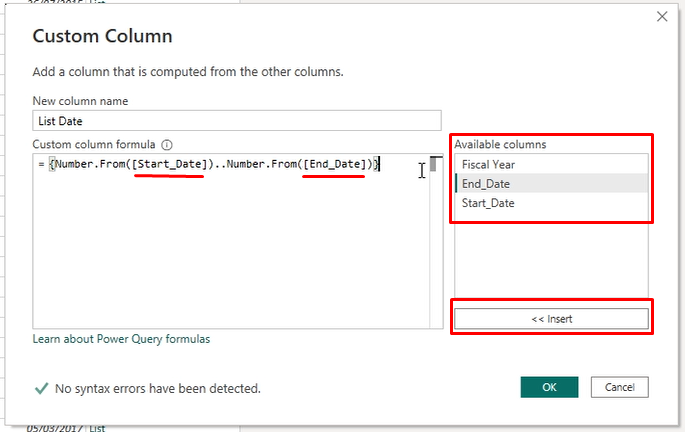
As demonstrated in the picture on the right or with more evidence in the function below. It starts with a list “{…}” inside its function Number.from get the first field date and after double dots”..” immediately after this repeat the function number.from but now get the field end date. To confirm click on the ok button. The column will be named “List Date”
={
Number.From([Start_Date])..Number.From([End_Date])
}
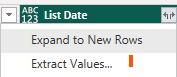
Now, select the opposite narrow and Expand to new rows.
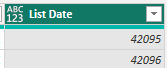
Change the type number to the data type.
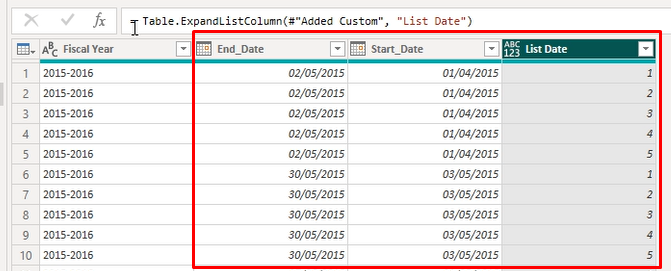
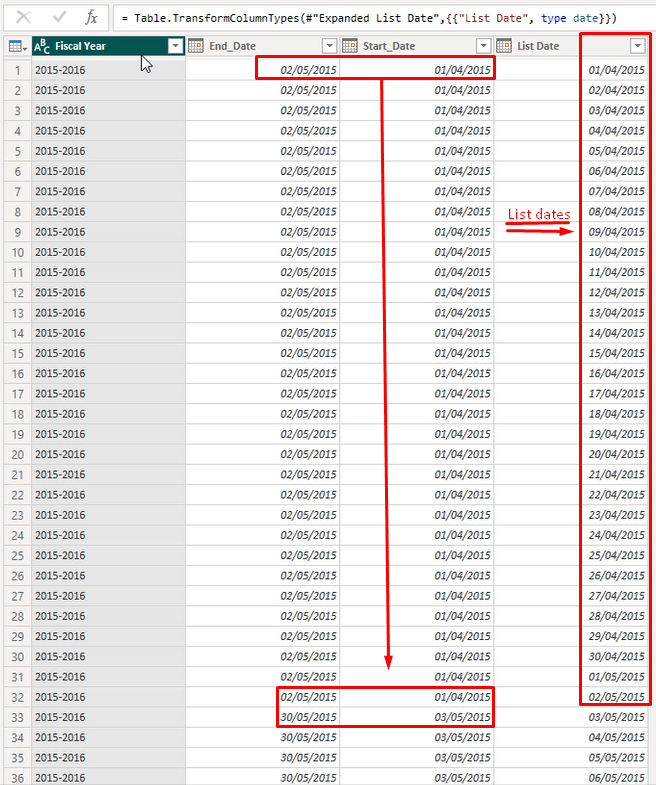
Whatever, we are our Power-BI list date range. In the picture on the right, The list will be expanded adding each row by the interval date.
In order the details the explanation we will start with the first line in the column Start and End.
These fields have the interval series date from 01/04/2015 until 02/05/2015 and these values will be repeated till line 32, in the next line will start the second interval date.
In the new (4) column named List date, the first rows fell with the first date of the interval date from 01/04/2015 progressively fell rows by rows until the last date to the interval series 02/05/2015.
Additional considerations to create Power-BI list date range:
In the final analysis, It’s important to note that the Number.From function may generate errors if the provided value cannot be converted into a number. Therefore, it’s necessary to ensure that the data is correct and in an appropriate format before performing the conversion.
These functions are very important to create Power-BI list date range. This supposes in your company you use specific periods to analyze data when you have gaps in periods.
To know how to create and why to create a date table see our post about this topic. click here.
Artifical inteligence Power Apps Power Automate Power BI Power Platform Connector UX design
